



Introduction
Chest dips are one of the most demanding bodyweight exercises for the chest and triceps, and many people can’t perform even a single clean rep when they start. The assisted chest dip solves that problem. You kneel on a pad connected to a counterweight that lifts part of your body weight, letting you practice the full dip movement with a load that matches your current strength.
What makes this machine unusual is that more weight makes the exercise easier, not harder. The heavier the counterweight you select, the more of your body weight it supports. As you get stronger, you gradually reduce the assistance until you can dip your full body weight.
You use the same machine for the assisted triceps dip. The difference is torso position: in the chest version, you lean slightly forward to engage more chest, while in the triceps version, you stay upright. Like other machine exercises, it can contribute to muscle growth, as research shows machine-based training can build muscle as effectively as free weights when effort and volume match.
The assisted chest dip is a dip performed on an assisted dip machine, where the lifter kneels on a pad connected to a counterweight that lifts part of the body weight. With the torso leaning slightly forward, the body is lowered between the handles and pressed back up, training the lower fibers of the pectoralis major and the triceps brachii, with the anterior deltoids assisting. The more counterweight you select, the easier the exercise becomes.
Other Names for Assisted Chest Dip
The exercise and the machine are known under several names.
- Machine dip
- Assisted dip machine
- Counterweight dip
- Gravitron dip
- Assisted parallel bar dip
Required Equipment
You need an assisted dip machine, which is often combined with an assisted pull-up station. You can read more about different machines in our article on exercise machines.
- Assisted dip machine with a knee pad (or foot platform) and a counterweight stack
- Dip handles, usually adjustable or rotatable into the dip position
How to Perform Assisted Chest Dip
Selecting the right assistance and getting on and off the machine safely are just as important as the dip itself.
Starting Position
Set the assistance level and the handles before you step onto the machine.
- Select the assistance on the weight stack (more weight means more help)
- Rotate the handles into the dip position if your machine requires it
- Stand on the foot steps and grip the handles with a neutral grip
- Place one knee on the pad, then the other, and let the pad rise until your arms are straight
- Lean your torso slightly forward, with your chest roughly over your hands
- Pull your shoulders down and back, away from your ears
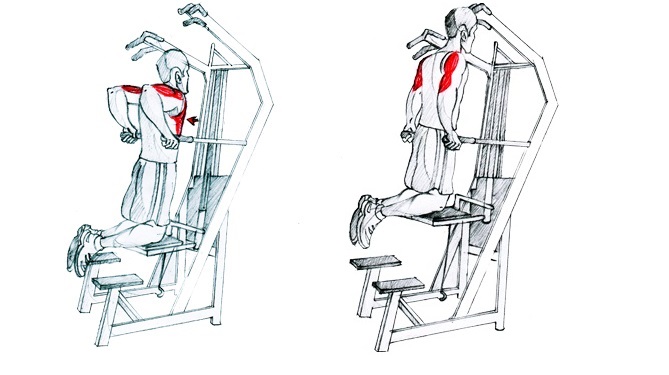
Execution (Action Phase)
Lower and press your body in a smooth, controlled movement, keeping the slight forward lean throughout.
- Inhale and bend your elbows to lower your body (see our guide on breathing technique)
- Keep your elbows moderately tucked as you descend
- Lower until your upper arms are about parallel to the floor
- Exhale and press through your hands to straighten your arms
- Keep the slight forward lean and your shoulders down throughout the set
- Finish the last rep at the bottom position before stepping off
If you stay completely upright, the exercise shifts more toward the triceps. For a chest-focused dip, keep your torso leaning slightly forward.
Video Demonstration
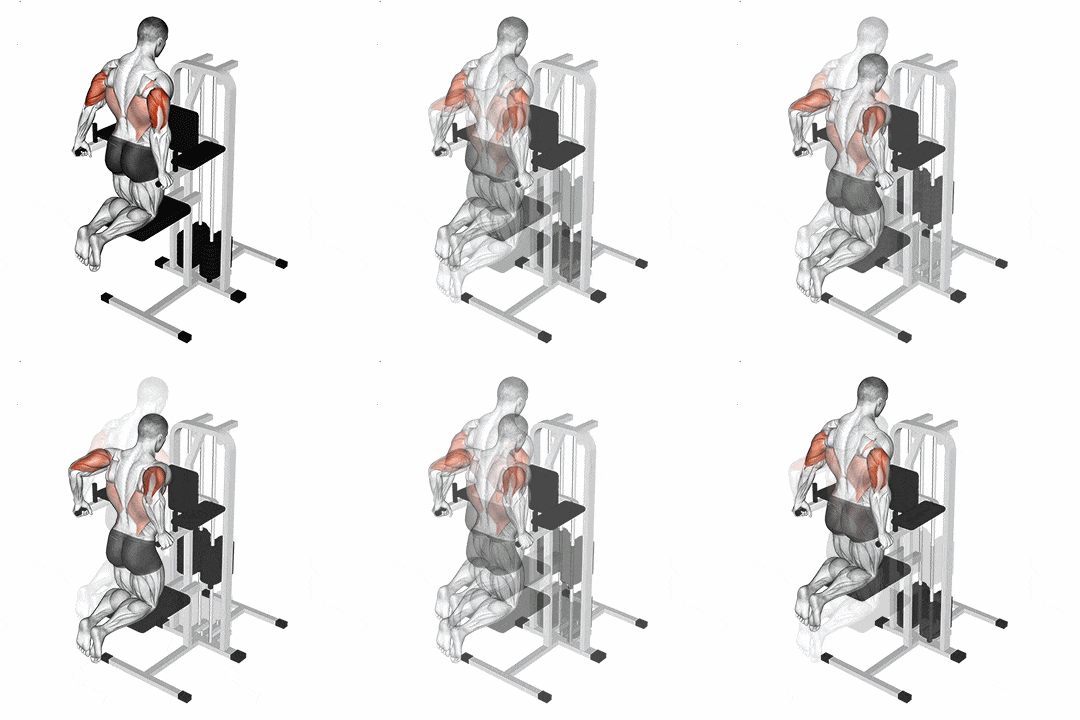
Watching the assisted chest dip shows how the forward lean and controlled depth work together.
In the video below, notice how the lifter kneels on the pad, leans slightly forward with the chest over the hands, and lowers the body until the upper arms are about parallel to the floor. The press back up is smooth, and the shoulders stay down throughout the set.

The assisted dip machine is the only machine in the gym where people proudly tell me they used “the whole stack,” not realizing that on this machine, the whole stack means the machine did almost all of the work. It is one of the few places where more weight makes the exercise easier, and that confuses almost everyone the first time.
With my clients, the goal is simple: every few weeks, we take a little assistance away. I also remind them that the dip becomes a chest exercise only if they lean forward slightly and keep the chest over the hands. Stay upright, and the triceps take over. Lower until the upper arms are about parallel to the floor, not deeper, and the shoulders will thank you later.
Quick Form Checklist
Run through these cues before every set to keep the exercise safe and focused on the chest.
- Assistance set for 8–15 controlled reps
- Slight forward lean, chest over the hands
- Shoulders down, away from the ears
- Upper arms about parallel at the bottom
- Step off at the bottom position
Technical Emphasis & Targeting Adjustments
Small adjustments to torso angle, depth, and tempo change how the assisted dip loads your muscles.
- Forward lean → more chest involvement. Leaning the torso slightly forward changes the direction of the press relative to the body and brings more of the chest into the movement. Coaches widely use this cue, although direct research comparing lean angles is limited.
- Upright torso → more triceps involvement. Keeping the torso vertical shifts more of the work onto the triceps, which is the setup used in the assisted triceps dip.
- Controlled depth → safer shoulders. Lowering until the upper arms are about parallel to the floor provides a good stretch without forcing the shoulders into an extreme position.
- Slower eccentric → more strength and control. Lowering yourself over 2–3 seconds increases time under load and builds control. Learn more about eccentric training.
- Less assistance → more load. Reducing the counterweight increases the share of body weight you must press, which is the main way to progress on this machine.
Common Mistakes
Most assisted dip mistakes come from poor depth control or from forgetting how the counterweight works.
- Using too much assistance. Too much help makes the exercise so easy that it no longer challenges your muscles. Choose an assistance level that allows 8–15 hard reps.
- Going too deep. Sinking far below parallel puts heavy stretch on the front of the shoulder. Stop when your upper arms are about parallel to the floor.
- Shrugging the shoulders. Letting the shoulders rise toward the ears shifts stress to the upper traps and the front of the shoulder. Keep your shoulders pulled down and back.
- Staying completely upright. An upright torso turns the exercise into a triceps dip. For chest emphasis, lean slightly forward.
- Bouncing at the bottom. Dropping quickly to the bottom and bouncing out stresses the shoulders. Lower yourself with control and reverse the movement smoothly.
Getting off the machine is where most awkward moments happen. Because the counterweight pushes the knee pad upward, stepping off at the wrong moment can make the pad shoot up suddenly. Finish your last rep at the bottom position, place one foot back on the foot step, and then the other.
Only once both feet are securely on the steps should you let the pad rise. Getting on works the same way in reverse: stand on the steps, grip the handles, and place one knee on the pad at a time. It takes a few seconds, but it keeps every set calm and controlled from start to finish.
Mechanical Considerations
During a dip, your shoulders move into extension as you lower your body, then into flexion and adduction as you press back up, while your elbows extend. You can read more about these joint actions in our guide to anatomical movements. Research on bar dips shows that the movement effectively targets the pectoralis major and triceps brachii, and that muscle activation increases further as fatigue builds during a set.
A study comparing bench, bar, and ring dips also noted that the dip has been criticized as a potentially high-risk exercise for the shoulder, mainly because of the deep shoulder extension at the bottom of the movement. The assisted machine reduces the load, which makes it easier to control depth and technique while building strength. No study has examined the assisted dip machine directly, so its effects are based on research on bar dips and biomechanical reasoning. As a compound exercise, it trains the chest, triceps, and front delts together.
Muscles Worked in Assisted Chest Dip
MAIN MUSCLES
- Pectoralis major (with emphasis on the lower fibers)
- Triceps brachii
SECONDARY MUSCLES
STABILIZERS
- Rotator cuff muscles
- Pectoralis minor and other scapular stabilizers
ANTAGONISTS
Assisted Chest Dip Pros and Cons
The assisted chest dip is a valuable exercise for building up to bodyweight dips, but it also has some limitations.
Advantages
- Makes dips accessible. The counterweight allows almost anyone to practice the dip movement, regardless of current strength.
- Precise progression. Reducing the assistance one plate at a time allows steady, measurable progress toward bodyweight dips.
- Trains chest and triceps together. The dip strongly involves both the chest and the triceps, making it an efficient pressing exercise.
- Easier control of technique. With less load, it is easier to practice proper depth, shoulder position, and torso angle.
Potential Drawbacks
- Machine availability. Not every gym has an assisted dip machine, and it is often shared with the assisted pull-up station.
- Kneeling position limits leaning. Some machines make it harder to lean forward, which can shift the emphasis toward the triceps.
- Shoulder demands. The deep stretch in the dip can be uncomfortable for lifters with shoulder issues.
- Confusing load selection. The reversed weight logic often confuses beginners, especially during the first sessions.
Safety Considerations
A review of resistance-training injuries reported that the shoulder complex accounted for up to 36% of documented injuries and disorders, although much of the available evidence was retrospective. Because dips load the shoulder in a stretched position, keep these precautions in mind.
- Shoulder discomfort. Limit the depth to about parallel and stop if you feel pinching or sharp pain. Learn more about shoulder joint anatomy and the scapula’s role in shoulder health.
- Previous pectoral strain. Lifters recovering from a pectoral strain should start with high assistance and a reduced depth.
- Elbow irritation. Dips place significant demand on the triceps and elbows. Watch for signs of triceps tendonitis and avoid locking out forcefully.
- Getting on and off the machine. Stepping off too early can make the knee pad shoot up. Finish the set at the bottom and step onto the foot steps before releasing the pad.
Assisted Chest Dip Variations
Seated machine dips
Difficulty: Easier than the standard version

On a seated dip machine, you sit with your back against a pad and press the handles downward. Leaning slightly forward away from the back pad brings more of the chest into the movement.
Band-assisted dips
Difficulty: Similar to the standard version
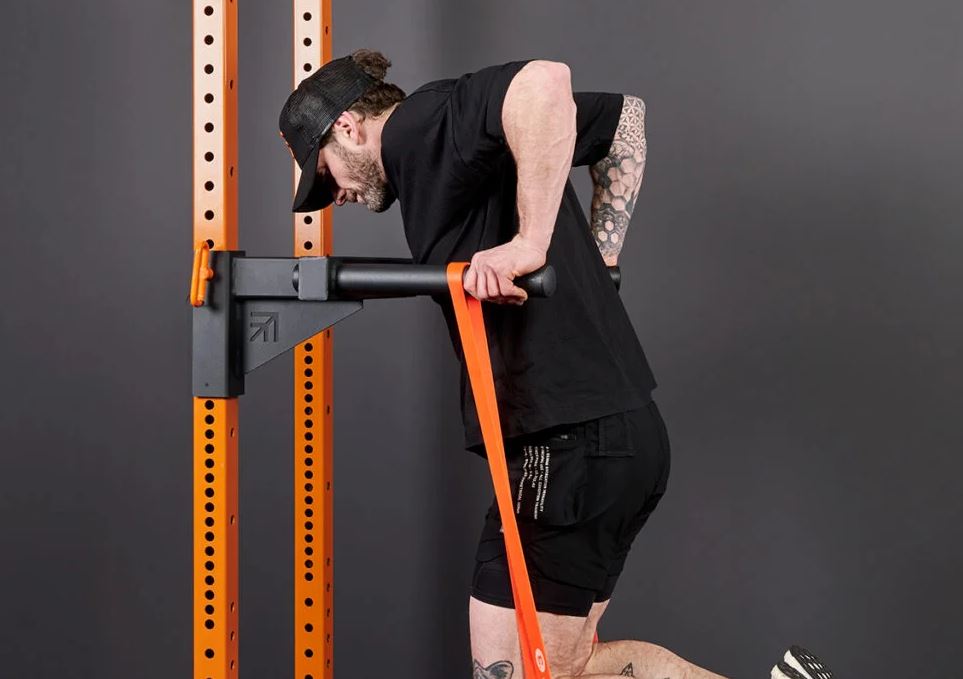
A resistance band looped around the dip bars and under your knees provides assistance without a machine. Unlike the machine, the band helps most at the bottom and least at the top. Our guide to band-assisted dips explains how to set it up.
Negative dips
Difficulty: Harder than the standard version

Jump or step into the top position on parallel bars and lower yourself slowly over 3–5 seconds. Negative repetitions build strength in the dip pattern and are a great bridge to full bodyweight dips.
Paused assisted chest dip
Difficulty: Harder than the standard version

Holding the bottom position for 1–2 seconds removes the rebound and builds strength where the dip is hardest. Keep the depth controlled during the pause.
Bodyweight chest dips
Difficulty: Harder than the standard version

Performing dips on parallel bars without assistance is the natural goal of this exercise. Lean slightly forward to keep the emphasis on the chest.
Replacement Exercises (Substitutes) for the Assisted Chest Dip
If the assisted dip machine is unavailable, these exercises also train the lower chest. For more options, see our guide to the best lower chest exercises.
- Decline barbell bench press. The decline barbell bench press allows heavy loading of the lower chest.

- Decline dumbbell bench press. The decline dumbbell bench press lets each arm move independently.

- Smith machine decline press. The Smith machine decline press offers a guided bar path and built-in safety.
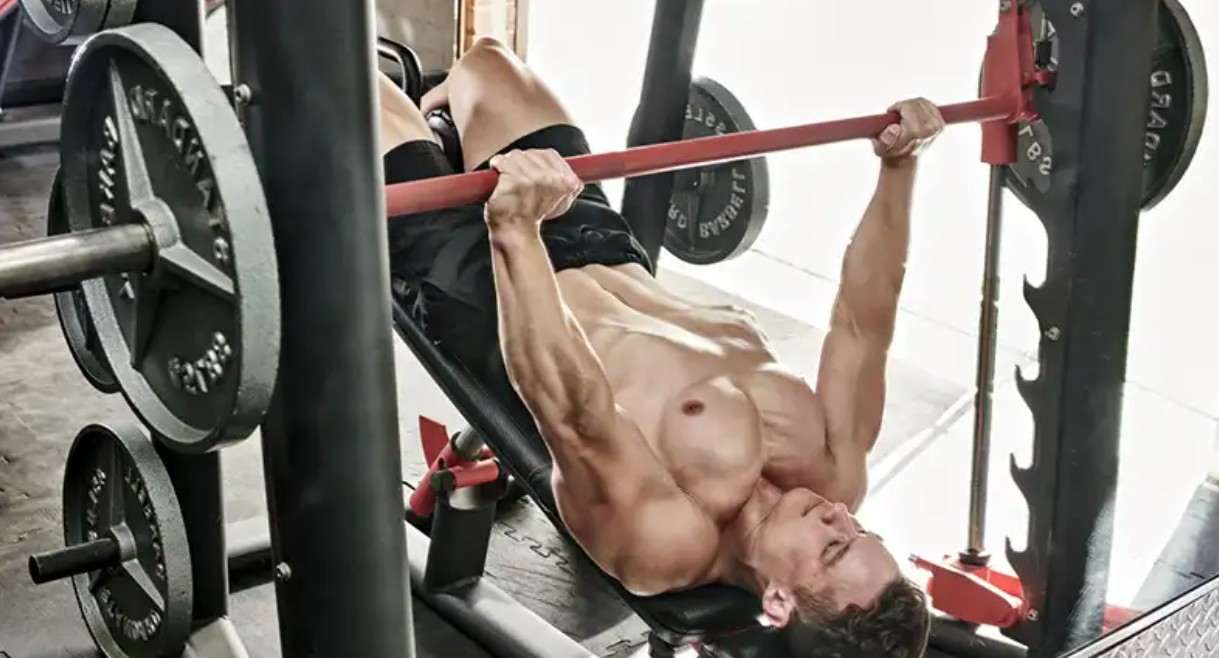
- Incline push-ups. Incline push-ups are a simple bodyweight option that emphasizes the lower chest.

- Decline bench cable fly. The decline bench cable fly isolates the lower chest with constant cable tension.

- Cable crossover. The high-to-low cable crossover trains the lower chest through a downward arc.

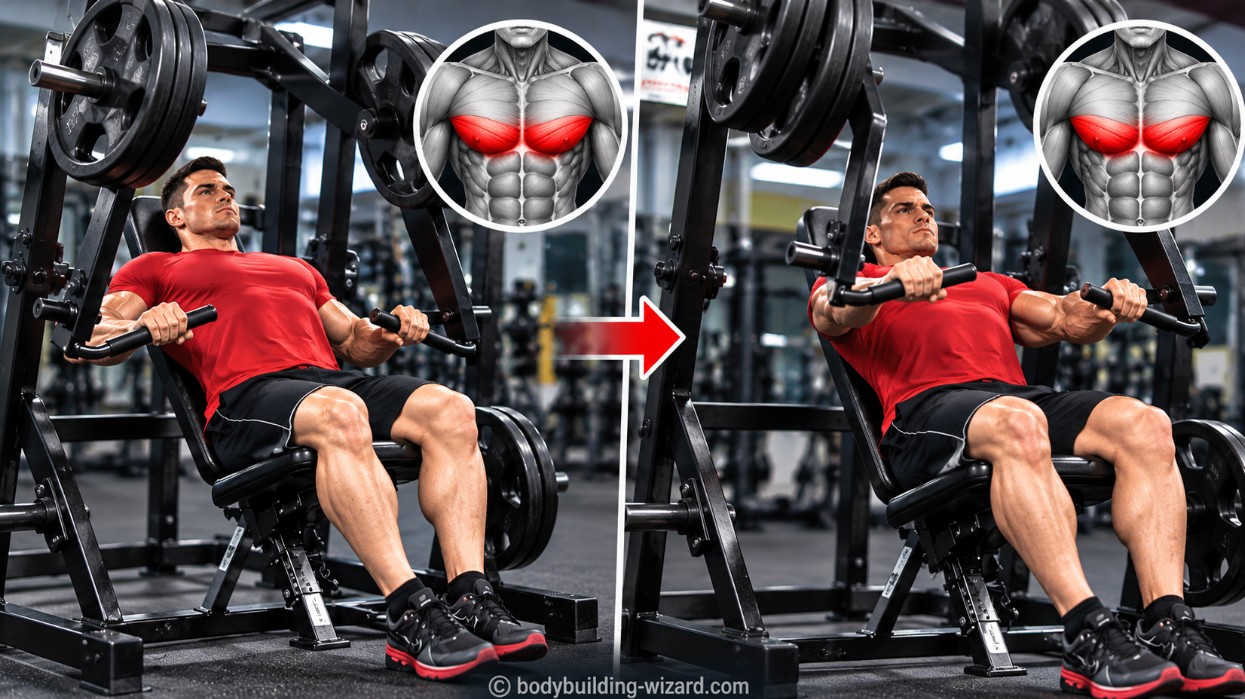
- Decline machine press. The decline machine press trains the lower chest from a seated position, with the handles moving forward and downward. Like the Smith machine, it lets you train safely without a spotter, but without the head-down position of a decline bench.
How to Program the Assisted Chest Dip
How you program the assisted chest dip depends mainly on your current strength and your progress toward bodyweight dips.
Show full programming guideHide programming guide ▾
| Goal | Sets | Reps | Rest | Tempo |
|---|---|---|---|---|
| Hypertrophy | 3–4 | 8–15 | 60–90 s | 2–3 s lowering, controlled press |
| Strength (less assistance) | 3–5 | 5–8 | 2 min | Controlled lowering, forceful press |
| Muscular endurance | 2–3 | 15–20 | 45–60 s | Steady, continuous |
Muscle growth can occur across a wide range of repetitions when sets are taken close to failure, so treat these numbers as guidelines rather than strict rules. Adjust your rest periods between sets based on how recovered you feel.
- After your main pressing exercise as a lower chest and triceps movement
- As a progression step toward bodyweight chest dips
- As a high-rep finisher with more assistance at the end of a chest workout
- On push days for lifters who can’t yet perform bodyweight dips
Apply progressive overload in reverse: instead of adding weight, gradually reduce the assistance by one plate once you can complete all sets at the top of your rep range. When you can perform 8–10 good reps with minimal assistance, follow our guide on how to do your first dip to move on to bodyweight dips.
Assisted Dip Progression Example: From Machine Assistance to Bodyweight Dips
To progress on an assisted dip machine, gradually reduce the counterweight while maintaining the same range of motion, forward torso lean, and controlled technique. Remember: less assistance means more of your own body weight to lift.
Here’s a practical example for a lifter weighing approximately 80 kg (176 lb):
| Stage | Machine Assistance | Approximate Body Weight Lifted | Target |
|---|---|---|---|
| 1 – Starting point | 40 kg (88 lb) | 40 kg (88 lb) | 3 × 8–10 |
| 2 – Building strength | 30 kg (66 lb) | 50 kg (110 lb) | 3 × 10–12 |
| 3 – Reducing assistance | 20 kg (44 lb) | 60 kg (132 lb) | 3 × 8–10 |
| 4 – Near bodyweight | 10 kg (22 lb) | 70 kg (154 lb) | 3 × 8–10 |
| 5 – Unassisted dips | 0 kg | 80 kg (176 lb) | 3 × 5–8 |
When should you reduce assistance?
Once you can complete all three sets at the upper end of your target repetition range with controlled technique and approximately 1–2 repetitions in reserve, reduce the assistance by the smallest available increment.
Expect your repetitions to decrease temporarily after each reduction. Build them back up before progressing again. You don’t need to reduce assistance every workout or every week.
Keep the same slight forward lean and comfortable dip depth throughout the progression. If you need to shorten the movement, bounce at the bottom, or change your torso position to complete the repetitions, you have probably reduced the assistance too quickly.
Note: These numbers are illustrative. Actual assistance varies by machine design, friction, and counterweight mechanics, so the selected weight does not always translate into an exact reduction in body-weight load.
Assisted Chest Dip vs Bodyweight Chest Dip (Comparison Table)
| Criteria | Assisted Chest Dip | Bodyweight Chest Dip |
|---|---|---|
| Load | Body weight minus counterweight | Full body weight (or more) |
| Difficulty | Adjustable | High |
| Progression | Reduce the assistance | Add reps or external weight |
| Stability Demand | Lower (knee pad supports the body) | Higher |
| Equipment | Assisted dip machine | Parallel bars |
| Best For | Beginners, building up to dips | Intermediate and advanced lifters |
Bodyweight chest dips are the goal for most lifters. They require more strength and stability, and you can progress them by adding external weight. If you train at a gym with an assisted dip machine, it also makes sense to use the same station for the assisted pull-up to build pulling strength.
The assisted chest dip is the ideal tool for building up to bodyweight dips, allowing you to practice the movement with the right load. Once you can perform 8–10 clean reps with very little assistance, you are usually ready for the bars. Later on, you can take the next step with ring dips, which add the challenge of stabilizing free-moving rings.
Final Thoughts
The assisted chest dip makes one of the most effective chest and triceps exercises accessible to almost everyone. By using a counterweight to support part of your body weight, you can learn the dip pattern, build strength, and progress steadily toward bodyweight dips.
Lean slightly forward, keep your shoulders down, and lower until your upper arms are about parallel to the floor. Remember, more weight on this machine means more help, so reduce the assistance gradually as you get stronger. If you want to learn more about the bone where the chest attaches, read our guide to the sternum.
Frequently Asked Questions
How does the assisted dip machine work?
The machine uses a counterweight connected to a knee pad. The more weight you select, the more of your body weight is supported, and the easier the exercise becomes. This is the opposite of most other weight machines.
How much assistance should I use?
Choose a level that allows 8–15 controlled reps with good form. As you get stronger, gradually reduce the assistance until you can perform bodyweight dips.
What is the difference between the assisted chest dip and the assisted triceps dip?
Both use the same machine. In the chest dip, you lean your torso slightly forward to place more emphasis on the chest. In the triceps dip, you keep your torso upright to shift more of the work to the triceps.
What muscles does the assisted chest dip work?
It works the pectoralis major, especially its lower fibers, along with the triceps brachii and anterior deltoids. The rotator cuff and scapular muscles help stabilize the shoulders.
How deep should I go on the assisted dip?
Lower your body until your upper arms are about parallel to the floor. Going much deeper increases stress on the front of the shoulders.
Is the assisted chest dip good for beginners?
Yes. It is one of the best ways to learn the dip pattern and build strength before attempting bodyweight dips.
Can the assisted chest dip build the lower chest?
It can contribute to lower chest development, especially with a slight forward lean. Research shows that bar dips effectively activate the pectoralis major and triceps, although the assisted machine version has not been studied directly.
Are dips bad for the shoulders?
Dips have been described as a potentially higher-risk exercise for the shoulders, mainly because of the deep stretched position. Controlling the depth and avoiding bouncing at the bottom make them much safer for most people.
How do I progress from assisted dips to regular dips?
Gradually reduce the assistance every few weeks. Once you can do 8–10 clean reps with very little assistance, try bodyweight dips or negative dips on parallel bars.
Should I do assisted dips before or after bench press?
Most lifters perform them after their main pressing exercise, as a secondary movement for the lower chest and triceps.
