



The single-arm lat pulldown is a cable pulldown performed with one arm at a time, usually with a D-handle attached to the high pulley of a lat pulldown machine. You pull the handle down by driving your elbow toward your hip, then return it overhead until your arm is fully extended. It trains the latissimus dorsi and teres major, with help from the mid-back and the elbow flexors.
Many lifters choose the single-arm version because it makes the lat easier to feel. That’s not just a gym impression: in a study of untrained women, specific instruction to focus on the lats increased latissimus dorsi activity during the lat pulldown, without reducing biceps activity. In other words, focusing on the target muscle can help, but it doesn’t turn a multi-joint pull into an isolation exercise.
Because each side works independently, the exercise fits naturally into programs that include unilateral training. In this guide, you’ll learn how to perform the single-arm lat pulldown with proper form, which muscles it works, how to program it, and how it compares with the classic two-arm lat pulldown.
The single-arm lat pulldown is a unilateral cable exercise in which a single handle attached to a high pulley is pulled downward with one arm, from full overhead extension until the elbow is beside the torso. It’s a multi-joint vertical pull that mainly trains the latissimus dorsi and teres major, with help from the lower and middle trapezius, rhomboids, and elbow flexors.
Clients often ask me how they “should” sit for single-arm lat pulldowns, because they see so many versions online. My answer is that all three common setups are valid; they just suit different needs. Sitting on the lat pulldown machine facing the stack is the most stable option, because the thigh pad holds you in place and lets you focus on the pull.
Sitting sideways to the machine changes the angle of pull and lets the elbow travel down along the side of the body, which many lifters like. Half-kneeling at a cable column removes the thigh pad completely, so the trunk has to work harder to stay still. I start most clients facing the machine, and only move them to the other setups once they can keep the torso quiet and the shoulder comfortable.
— Krunoslav, Ph.D. in Kinesiology
Other Names for the Single-Arm Lat Pulldown
You’ll come across this exercise under several names:
- One-arm lat pulldown – the most common alternative name.
- Unilateral lat pulldown – emphasizes that one side works at a time.
- Single-arm cable pulldown – used when you do the exercise at a cable column.
- One-arm high-pulley pulldown – describes the equipment setup.
Required Equipment
You need a high pulley and a single handle. If you’re new to cable training, our beginner’s guide to cable pulley machines explains the basics:
- Lat pulldown machine or high cable pulley. A pulldown machine with a thigh pad offers the most stability; a cable column works for kneeling or standing versions.
- D-handle. A single handle that lets the hand rotate freely during the pull.
- Wrist straps (optional). Wrist straps help if your grip tires before your lats.
- Resistance band (optional). An overhead-anchored band works for home training; see the pros and cons of resistance bands.
How to Perform the Single-Arm Lat Pulldown
A good single-arm lat pulldown starts with a stable seat and the cable lined up with your working shoulder. Take a moment to set this up before the first rep.
Starting Position
Attach a D-handle to the high pulley, then:
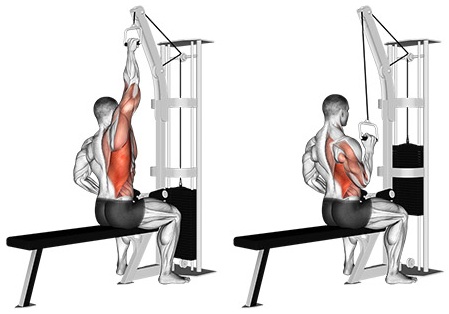
- Sit on the lat pulldown seat facing the machine and secure your thighs under the pad.
- Shift slightly to one side so the cable runs straight down toward your working shoulder.
- Grab the handle with a neutral or overhand grip and let your arm extend fully overhead, allowing the shoulder blade to rise naturally into a stretch.
- Sit tall with a slight backward lean of about 10–15 degrees, your chest up, and your spine and neck neutral.
- Place your free hand on your thigh or the thigh pad for support.
Execution
From the stretched position, pull with control:
- Drive your elbow down and slightly back toward your hip; the shoulder blade moves down naturally with the arm.
- Let your hand rotate slightly if it wants to, rather than forcing it into a fixed position.
- Keep your torso still, without leaning sideways or rotating toward the working arm.
- Pull until your elbow is beside your torso and the handle is near your shoulder or upper chest, then pause briefly.
- Return the handle under control until your elbow is fully or nearly fully extended and the shoulder blade has risen into a stretch.
- Exhale during the pull or at the bottom, and inhale as you return the handle overhead.
Complete all reps on one side, then switch arms. Starting with your weaker side helps keep the reps even.

Video Demonstration
The video below shows the single-arm lat pulldown from setup to the final rep. Notice how the lifter sits slightly off-center so the cable runs straight down to the working shoulder.
Watch the top and bottom of each rep. At the top, the arm reaches fully overhead, and the shoulder rises into a stretch; at the bottom, the elbow finishes beside the torso while the torso stays still. Filming yourself from the front makes it easy to spot any side bending.

The mistake I see most often on single-arm lat pulldowns is what I call the “teapot.” As the lifter pulls, the whole torso tips toward the working side, like the little teapot from the children’s song that tips over to pour. The handle comes down, but a good part of the movement comes from bending the trunk sideways instead of from the lat.
With clients, I ask them to sit tall, keep both hips heavy on the seat, and imagine their ribs stacked over their pelvis. Then I take some weight off. The reps get a little lighter, but most clients immediately feel a much stronger stretch at the top and a harder squeeze at the bottom. That’s the moment they realize the lat was only partly involved before.
Quick Form Checklist
Check these points before and during every set:
- Thighs secured, cable lined up with the working shoulder
- Arm fully extended overhead at the start
- Elbow drives down toward the hip
- Torso stays still, no side bending or twisting
- Controlled return to a full stretch
With a D-handle, small changes in hand position change how your elbow travels and where you feel the pull. This is the overview I give my clients:
| Grip | Elbow Path | Typical Characteristics |
|---|---|---|
| Neutral (palm facing in) | Down and slightly in front of the torso, toward the hip | Comfortable for most shoulders; the setup I use most |
| Pronated (palm facing forward) | Down along the side of the body | Tends to emphasize shoulder adduction; feels closer to a wide-grip pulldown |
| Supinated (palm facing back) | Down and in front of the torso | Tends to increase biceps involvement; useful for lifters who like chin-ups |
Most of my clients use a neutral grip, because it’s comfortable and lets the hand rotate naturally during the pull. If a client wants the pulldown to feel more like a wide-grip pulldown, we switch to a pronated grip. A supinated grip is an option for clients who feel their lats well on chin-ups, although it usually brings the biceps more into play.
In a study on the lat pulldown, a pronated grip produced greater lat activation than a supinated grip, while grip width made little difference. That study used a two-handed bar, not a single handle, so it only partly applies here. In practice, I let comfort and the feel of the lat decide the grip.
— Krunoslav, Ph.D. in Kinesiology
Technical Emphasis & Targeting Adjustments
Small changes in how you pull shift where you feel the single-arm lat pulldown. Use these cues as practical adjustments:
- Elbow toward the hip → more lat emphasis. Driving the elbow down and slightly back emphasizes the main pulling action of the lats.
- Full stretch at the top → longer range of motion. Let the arm extend fully, and the shoulder blade rise to train the lat through its full range.
- Elbow slightly behind the torso at the bottom → more mid-back involvement. Finishing with the elbow a little behind you brings in the rhomboids and middle traps.
- Sit tall, ribs over pelvis → less side bending. A stacked trunk keeps the work on the lat and makes the obliques work as stabilizers.
- Lower for about 2–3 seconds → more eccentric control. A slower return makes the top stretch easier to feel and control.
Common Single-Arm Lat Pulldown Mistakes
Most mistakes on this exercise come from using too much weight or a poor setup. Watch for these:
- Bending sideways toward the working arm. Side bending replaces part of the lat’s work. Sit tall and reduce the load.
- Rotating the torso. Twisting toward the handle shortens the range for the lat. Keep your chest facing the machine.
- Cutting the stretch short. Stopping before the arm is fully extended overhead skips the range where the lat is lengthened. Let the arm straighten on every rep.
- Pulling with the biceps. Bending the elbow early turns the pull into a curl. Think about driving the elbow down, and read why you might not feel your lats if the back still doesn’t engage.
- Sitting in line with the pulley. If the cable pulls across your body, the shoulder and torso rotate. Shift your seat so the cable runs straight to the working shoulder.
Line up the cable with your working shoulder, not with the middle of the seat. On most lat pulldown machines, the pulley sits above the center of the seat. If you sit in the middle and pull with one arm, the cable runs at an angle across your body, and your torso will tend to rotate toward the stack.
Shift your seat a little to the side so the cable hangs straight down over the working shoulder. It’s a small adjustment, but it makes it much easier to keep the torso square and to feel the lat through the whole range. If you also want to work on the symmetry of your back, log the reps for each side separately.
Mechanical Considerations
Training one arm at a time changes the pulldown mechanics in several ways. Without a bar connecting both hands, the hand can rotate freely, and the elbow can follow its natural path, which many lifters find more comfortable for the shoulder. The arm can also reach further overhead at the top and finish lower at the bottom because there’s no bar to hit the chest or limit the shoulder’s movement. At the same time, the one-sided pull tends to bend and rotate the trunk, so the trunk muscles have to keep you square. This is biomechanical reasoning rather than a measured result.
No study appears to have examined the single-arm lat pulldown directly. Research on one-arm rows gives some context: rows performed with one arm produced more external oblique activity than two-arm rows, while two-arm rows generally produced more erector spinae activity. That study used rows, not pulldowns, and the thigh pad of a pulldown machine reduces the trunk demand considerably, but the general principle of a one-sided pull challenging the trunk likely applies.
Muscles Worked by the Single-Arm Lat Pulldown
The single-arm lat pulldown is a compound exercise, not an isolation exercise, because it involves both the shoulder and elbow joints:
MAIN
- Latissimus dorsi – adducts and extends the shoulder as the elbow drives down.
- Teres major – works closely with the lat in the same actions.
SECONDARY
- Lower and middle trapezius – control the shoulder blade as it moves down and back. Learn more about the trapezius muscle.
- Rhomboids – help retract the shoulder blade at the bottom.
- Posterior deltoid – assists shoulder extension.
- Elbow flexors – the biceps brachii, brachialis, and brachioradialis bend the elbow.
- Pectoralis major – the lower fibers assist in bringing the arm down from overhead; see our chest muscles anatomy guide.
STABILIZERS
- Obliques and other core muscles – resist side bending and rotation.
- Rotator cuff – stabilizes the shoulder joint.
- Forearm muscles – maintain the grip on the handle.
Pros and Cons
The single-arm lat pulldown is a versatile accessory exercise with a few limitations:
Advantages
- Easier to feel the lat. Many lifters find it easier to focus on one side at a time.
- Longer range of motion. Without a bar, the arm can reach farther overhead and finish lower.
- Shoulder-friendly path. Free-hand rotation lets the elbow follow its natural path.
- Reveals side-to-side differences. Training each side separately makes it easy to notice and track imbalances.
Potential Drawbacks
- Takes more time. Training one side at a time roughly doubles the time per set.
- Less suited to very heavy loads. It works best as an accessory exercise with moderate loads.
- Setup matters. If the cable isn’t aligned with the shoulder, the torso tends to rotate.
- Easy to cheat with side bending. Without attention, the trunk takes over part of the movement.
Safety Considerations
The single-arm lat pulldown is one of the more joint-friendly back exercises, but a few points are worth keeping in mind:
- Check the equipment. Make sure the handle is securely clipped and the pin is fully inserted in the weight stack.
- Control the return. Letting the handle snap back overhead pulls the shoulder abruptly into its end range. Return it under control.
- Respect your shoulder. If the fully stretched position is uncomfortable, shorten the range slightly at the top or try a different grip.
- Don’t chase heavy loads. Very heavy single-arm sets increase the temptation to twist and bend. Keep the weight manageable.
Single-Arm Lat Pulldown Variations
These variations let you change the setup, the equipment, or the trunk demand:
Half-Kneeling Single-Arm Lat Pulldown
Difficulty: Intermediate

Kneel on one knee at a cable column with the pulley set high. Without a thigh pad, the trunk has to work harder to stay square.
Sideways Single-Arm Lat Pulldown
Difficulty: Beginner to intermediate
Sit sideways to the machine, with the working arm closer to the pulley. The elbow travels down along the side of the body, which many lifters find helps them feel the lat.
Single-Arm Lat Pull-In
Difficulty: Intermediate
Stand or kneel side-on to a high pulley and sweep the elbow down toward your side in a wide arc. It emphasizes shoulder adduction and offers a different feel from the standard pulldown.
Single-Arm Band Pulldown
Difficulty: Beginner
Anchor a resistance band overhead and perform the same movement. It’s a practical home option, although the resistance increases as the band stretches. Our resistance band workout for beginners shows other ways to use bands.
Replacement Exercises
If you want a similar training effect, or need a different setup, these exercises are good substitutes:
- Close-Grip Lat Pulldown. The close-grip lat pulldown trains a similar elbow path with both arms.

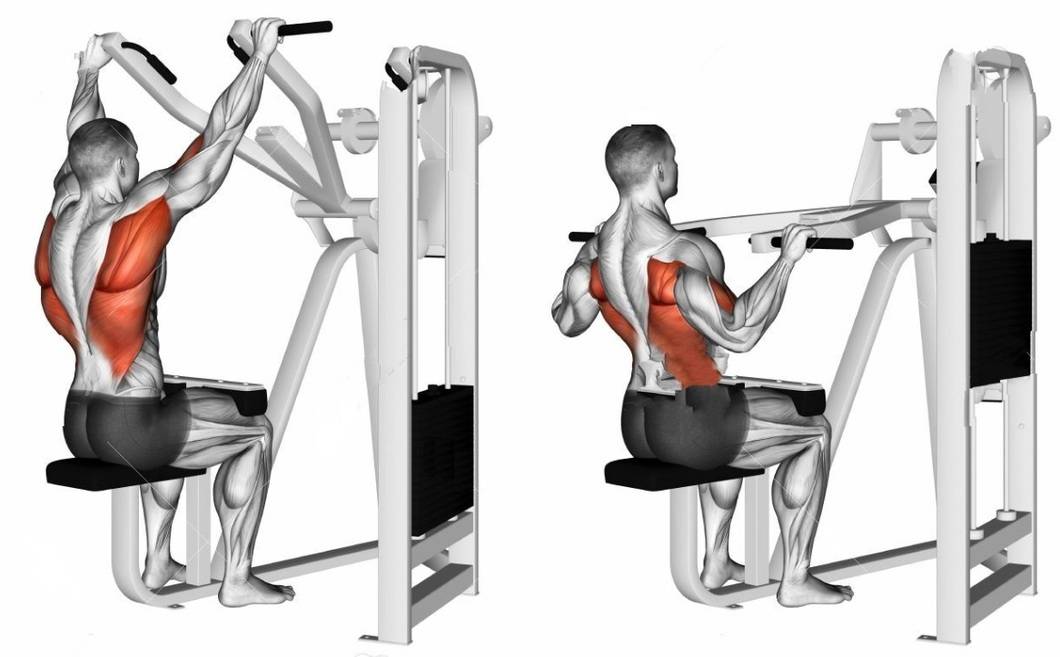
- Machine Lat Pulldown. The machine lat pulldown offers a guided path, and many machines have independent handles for one-arm use.
- Straight-Arm Lat Pulldown. The straight-arm lat pulldown trains the lats with minimal elbow-flexor involvement.

- Kneeling Lat Prayer Pulldown. The kneeling lat prayer pulldown is another way to emphasize the lats with a long range of motion.

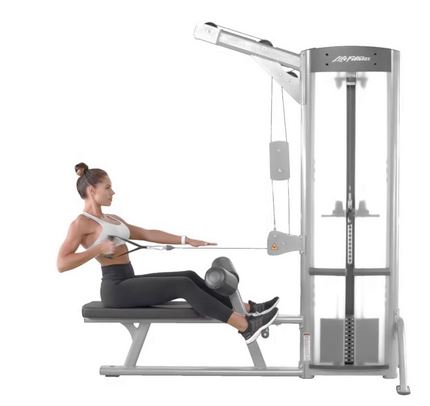
- One-Arm Cable Row. The one-arm cable row trains each side separately in a horizontal direction.
- Rock Climber Pull-Up. Rock climber pull-ups shift more body weight onto one arm as a bodyweight alternative.

How to Program the Single-Arm Lat Pulldown
Use the box below as a starting point and adjust it to your goals and training split.
Show full programming guideHide programming guide ▾
| Goal | Sets | Reps | Rest | Tempo |
|---|---|---|---|---|
| Hypertrophy | 3–4 | 8–15 | 60–90 s per side | 2–3 s return, brief pause at the bottom |
| Strength | 3–4 | 6–8 | 90–120 s per side | Controlled return, firm pull |
| Muscular endurance | 2–3 | 15–20 | 45–60 s per side | Steady, controlled |
The single-arm lat pulldown works best as an accessory exercise with moderate loads and a full range of motion. That’s not a compromise: muscle growth has been reported across a broad spectrum of loads and repetition ranges, provided sets are taken reasonably close to failure.
- After heavier vertical pulls, such as pull-ups or two-arm lat pulldowns
- As a lat-focused exercise at the start of a back session, to improve the feel of the lats
- In programs that address side-to-side differences
- Alternating arms without rest between sides, to save time
Add reps first, then a small weight increment once you reach the top of your rep range on both sides with a full stretch and a still torso. Apply progressive overload without letting the side bending creep back in.
Single-Arm Lat Pulldown vs Two-Arm Lat Pulldown
Both exercises train the same main muscles, but the setup changes the feel and the purpose:
| Feature | Single-Arm Lat Pulldown | Two-Arm Lat Pulldown |
|---|---|---|
| Handle | Single D-handle | Straight bar or wide-grip attachment |
| Hand rotation | Free | Fixed by the bar |
| Range of motion | Often longer at the top and bottom | Limited by the bar reaching the chest |
| Trunk demand | Higher; resisting side bending and rotation | Lower; symmetrical pull |
| Loading potential | Moderate | Higher |
| Side-to-side control | Each side works independently | The stronger side can compensate |
| Time per set | About double | Shorter |
| Best for | Accessory lat work and side-to-side balance | Main vertical pulling exercise |
The main difference is the freedom of movement. The single-arm version lets the hand rotate, and the arm move through a longer range, while the two-arm lat pulldown fixes the hands on a bar but allows heavier loads and a symmetrical pull.
Neither is better overall. Many lifters use the two-arm pulldown as their main vertical pull and the single-arm version as an accessory. For more comparisons, see our guides on wide-grip vs close-grip lat pulldowns and lat pulldowns vs pull-ups.
Final Thoughts
The single-arm lat pulldown is a practical way to train each lat on its own through a long range of motion. Line up the cable with your working shoulder, sit tall, drive the elbow toward your hip, and return to a full stretch on every rep.
Use it as an accessory to heavier vertical pulls and keep the loads moderate enough that your torso stays still. To understand the muscles behind every pulldown and pull-up, read our guide to the muscles involved in pulling movements.
Frequently Asked Questions
What muscles does the single-arm lat pulldown work?
It mainly works the lats and teres major, with help from the lower and middle traps, rhomboids, and elbow flexors.
Is the single-arm lat pulldown an isolation exercise?
No. It’s a compound exercise, because both the shoulder and elbow joints move. Focusing on the lat can increase its activity, but it doesn’t isolate it.
How much weight should I use?
Start with a load you can control for 8–15 reps with a still torso. Many lifters can use slightly more than half of their two-arm pulldown weight per arm.
Should I sit facing the machine or sideways?
Both work. Facing the machine is the most stable; sitting sideways changes the angle of pull and suits many lifters.
Which grip is best?
A neutral grip is the most comfortable for most lifters. Let the hand rotate naturally rather than forcing a fixed position.
Is it better than the regular lat pulldown?
Neither is better overall. The single-arm version offers more freedom and a longer range; the two-arm version allows heavier loads.
Can it fix muscle imbalances?
It helps you notice and train each side separately, which can support a more balanced back over time.
Where should I feel it?
You should feel it mainly along the side of your back, from the armpit toward the lower back, with some work in the arm.
Can I do it at home?
Yes. A resistance band anchored overhead works as a home alternative.
