



The Meadows row is a one-arm landmine row in which you stand perpendicular to the bar in a staggered stance, grip the thick end of the barbell sleeve with an overhand grip, and row with your elbow traveling away from your body. Named after the late IFBB pro bodybuilder and coach John Meadows, who popularized it, it trains the latissimus dorsi, upper back, and rear delts.
Because you row with one arm at a time, your trunk has to keep your torso from rotating. Research supports this: in one study, one-arm rows produced more external oblique activity than two-arm rows, while two-arm rows generally produced more erector spinae activity. The Meadows row itself wasn’t tested, and activation isn’t the same as long-term growth, but the finding fits the anti-rotation demand many lifters feel on this exercise.
The Meadows row is often confused with the single-arm landmine row. Both use an anchored barbell, but the stance, grip, and elbow path are different. In this guide, you’ll learn how to perform the Meadows row with proper form, which muscles it works, how to program it, and how it compares with the standard landmine row.
The Meadows row is a unilateral free-weight rowing exercise in which one end of a barbell is fixed in a landmine attachment or a corner, and the lifter stands perpendicular to the bar in a staggered stance, grips the end of the barbell sleeve with an overhand grip, and rows with the elbow traveling away from the torso. The exercise mainly trains the latissimus dorsi, middle trapezius, rhomboids, and rear delts, while the trunk works to resist rotation.
Clients often ask me whether the Meadows row is simply a single-arm landmine row with John Meadows’ name attached. It isn’t. The two exercises use the same anchored barbell, but three details change the exercise: you stand perpendicular to the bar instead of beside it, you grip the thick end of the sleeve with an overhand grip, and your elbow travels out and away from the body instead of close to the hip.
Those details shift the feel of the row toward the upper back and rear delts, while the lats still do plenty of work. They also make the grip much harder, because the sleeve is noticeably thicker than the bar itself. I usually teach the standard landmine row first and move clients to the Meadows row once they can keep their torso square and their lower back neutral on one-arm rows.
— Krunoslav, Ph.D. in Kinesiology
Other Names for the Meadows Row
You’ll come across this exercise under a few names:
- Meadows landmine row – highlights the landmine setup.
- Perpendicular landmine row – describes the stance relative to the bar.
- Sleeve-grip row – refers to holding the thick end of the barbell sleeve.
- Mountain Dog row – an informal name after John Meadows’ “Mountain Dog” training approach.
The single-arm landmine row is sometimes called a Meadows row, but that’s inaccurate; the two exercises differ in stance, grip, and elbow path.
Required Equipment
The equipment is the same as for other landmine exercises:
- Olympic barbell. One end stays in the anchor; you hold the other end.
- Landmine attachment or a secure corner. Use a landmine base or a corner protected with a towel so the bar can’t slide. The same setup works for the landmine 180 and other landmine exercises.
- Weight plates and a collar. Secure the plates so they can’t slide toward your hand.
- Wrist straps (optional). Wrist straps are useful because the thick sleeve often limits the grip before the back.
How to Do the Meadows Row
The Meadows row depends on a precise setup. Take a moment to position your feet and the bar correctly, because the stance determines how your elbow can travel during the pull.
Starting Position
Place one end of the bar in the landmine, load the free end, and secure the plates with a collar. Then:
- Stand perpendicular to the bar, with the loaded end beside your working side and the sleeve end roughly in line with your front foot.
- Use a staggered stance: the foot opposite your working arm is forward and close to the plates, and the leg on the working side is back.
- Hinge at the hips with your hips relatively high, as in a Romanian deadlift, until your torso is close to parallel with the floor, as far as you can keep a neutral spine.
- Rest the forearm of your free arm on your front thigh for support.
- Grab the thick end of the sleeve with an overhand grip, beyond the collar, and lift the bar slightly so your arm hangs straight.
- Keep your spine and neck neutral, with your gaze on the floor a little ahead of you.

Execution
From the starting position, row with control:
- Brace your trunk and drive your elbow up and away from your body, so it travels outward rather than close to your side.
- Allow the shoulder blade to move back naturally with the arm, without shrugging.
- Keep your torso square to the floor and avoid rotating it open as the bar rises.
- Pull until your elbow is slightly above or level with your torso, then pause briefly.
- Lower the bar under control until your elbow is fully or nearly fully extended and the shoulder blade has moved forward naturally, without rounding the upper back.
- Exhale during the pull or at the top, and inhale as you lower the bar.
Complete all reps on one side, then switch your stance and repeat with the other arm.

Video Demonstration
The video below shows the Meadows row from setup to the last rep. Watch how the lifter stands perpendicular to the bar, with the front foot close to the plates and the free forearm resting on the front thigh.
During the reps, watch the elbow and the bottom of each rep. The elbow travels out to the side rather than along the body, and every rep ends with the arm fully extended and the shoulder blade stretched forward. Filming your set from the side shows whether you reach that full stretch.

The most common Meadows row mistake I see is what I call the “T-rex row.” The lifter loads the bar with big plates, pulls a few inches up, lowers a few inches down, and never lets the arm straighten. From a distance, the arm looks like it’s stuck in that short, bent position of a T-rex. The weight is impressive, but half of the range, the stretch at the bottom, is missing.
My fix is to take some weight off and ask for a full stretch on every rep: the arm straight and the shoulder blade sliding forward before the next pull. Most clients lose a plate or two, but the next day they tell me they feel the upper back and lats in places they never did with the heavier weight. That’s usually when they stop counting plates and start counting good reps.
Quick Form Checklist
Check these points before and during every set:
- Perpendicular, staggered stance, front foot close to the plates
- Hips high, torso close to parallel, spine neutral
- Overhand grip on the thick sleeve, free forearm on the front thigh
- Elbow travels up and away from the body
- Full stretch at the bottom of every rep
On landmine rows, the way you hold the bar largely decides how your elbow travels, and the elbow path decides where you feel the work. This is the overview I give my clients:
| Grip | Elbow Path | Typical Characteristics |
|---|---|---|
| Overhand on the sleeve (classic Meadows row) | Up and away from the torso | Tends to emphasize the upper back and rear delts along with the lats; high grip demand |
| Overhand on the sleeve with straps | Up and away from the torso | Same path, but the back rather than the grip limits the set |
| Neutral on the bar near the loaded end | Close to the torso, toward the hip | This is the single-arm landmine row; tends to emphasize the lats |
I teach the classic overhand grip on the sleeve as the default, because it naturally lets the elbow travel away from the body. When a client’s hand gives out before the back, we add straps and keep the same path. If a client wants more lat emphasis, I don’t change the Meadows row; I switch to the single-arm landmine row with a neutral grip.
A small preliminary study on dumbbell bent-over rows found a non-significant trend toward higher rear delt and upper trapezius activity when the elbows were held out at 90 degrees, compared with elbows close to the body. With only three participants, the results are far from conclusive, and the Meadows row wasn’t tested, but the direction matches what I see with clients.
— Krunoslav, Ph.D. in Kinesiology
Technical Emphasis & Targeting Adjustments
Make small changes in how you pull to shift where you feel the Meadows row. Use these cues as practical adjustments:
- Elbow out and up → more upper-back and rear-delt work. Letting the elbow travel away from the body emphasizes horizontal abduction, which involves the rear delts, middle traps, and rhomboids.
- Elbow slightly closer to the body → more lat involvement. Bringing the elbow a little closer to the torso adds more shoulder extension, without turning the exercise into a standard landmine row.
- Full stretch at the bottom → more range of motion. Letting the arm straighten and the shoulder blade move forward trains the back through a longer range.
- Torso square to the floor → more anti-rotation work. Resisting the urge to twist keeps the load on the back and makes the obliques work as stabilizers.
- Pause at the top → more control. A brief pause with the elbow up removes momentum and makes it easier to feel the upper back.
Common Meadows Row Mistakes
Most Meadows row mistakes come from using too much weight or a careless setup. Watch for these:
- Cutting the range short. Partial reps with a heavy load skip the bottom stretch. Lower the weight and fully straighten the arm.
- Rotating the torso open. Twisting lets the trunk lift the weight and adds momentum. Keep both shoulders facing the floor.
- Standing in the wrong spot. If the front foot is too far from the plates, you reach for the bar and lose your balance. Keep the front foot close to the loaded end.
- Rounding the lower back. Losing the hinge increases spinal stress. Keep the hips high and the spine neutral, and use your free forearm for support.
- Pulling with the biceps. Bending the elbow early turns the row into a curl. Drive the elbow up and away, and read why you might not feel your lats if your back still doesn’t engage.
Use straps without guilt. The barbell sleeve is much thicker than the bar itself, and on the Meadows row your grip often fails long before your back does. If your hand gives out while your upper back still has reps left, the set is training your grip, not your back.
Wrist straps solve that problem, so the back becomes the limiting factor. If you also want stronger hands, train your grip separately with exercises such as the farmer’s walk or the plate pinch hold, rather than letting it limit your back training.
Mechanical Considerations
The Meadows row combines a landmine’s pivot-constrained bar path with a perpendicular stance. Because one end of the bar rests on the floor, you never lift the whole bar, and the loaded end follows an arc around the anchor rather than a straight vertical line. The perpendicular stance and overhand grip on the sleeve make it natural for the elbow to travel away from the body, shifting more of the movement toward horizontal abduction than in the standard landmine row. For these reasons, Meadows row loads aren’t directly comparable with dumbbell or barbell row loads. This is biomechanical reasoning, not a measured result.
No study appears to have examined the Meadows row directly. The hinged, unsupported posture is the closest link to existing research: in a comparison of rowing exercises, the standing bent-over row produced the largest lumbar spine load of the rows tested. The Meadows row uses a similar hip hinge, with the free forearm on the thigh sharing some of the work and only one arm loaded. That suggests a lower but still meaningful demand on the lower back, although this hasn’t been measured.
Muscles Worked by the Meadows Row
The Meadows row is a compound exercise that involves several joints and muscle groups:
MAIN
- Latissimus dorsi – extends the shoulder during the pull.
- Middle trapezius – retracts the shoulder blade at the top. Learn more about the trapezius muscle.
- Rhomboids – work with the middle traps to pull the shoulder blade toward the spine.
- Posterior deltoid – contributes substantially as the elbow travels away from the body.
SECONDARY
- Teres major – assists the lats.
- Lower trapezius – helps control the shoulder blade.
- Elbow flexors – the biceps brachii, brachialis, and brachioradialis bend the elbow.
STABILIZERS
- Erector spinae – hold the spine neutral in the hinged position.
- Obliques and other core muscles – resist rotation toward the working side.
- Glutes and hamstrings – hold the hip hinge.
- Rotator cuff and forearm muscles – stabilize the shoulder and hold the thick sleeve.
Pros and Cons
The Meadows row has clear strengths, along with a few practical limitations:
Advantages
- Trains each side independently. One-arm work makes side-to-side differences easier to notice, supporting symmetrical muscular development.
- Upper-back emphasis. The flared elbow path involves the rear delts, middle traps, and rhomboids alongside the lats.
- Long range of motion. The setup allows a deep stretch at the bottom of each rep.
- Anti-rotation challenge. Keeping the torso square adds a trunk-stability component.
Potential Drawbacks
- High grip demand. The thick sleeve often limits the set before the back.
- Needs a landmine or secure corner. Not every gym has a suitable setup.
- Lower back still works. The hinged position is demanding; the chest-supported dumbbell row is a better option when you need to unload the lower back.
- More complex setup. Stance and bar position take some practice to get right.
Safety Considerations
The Meadows row is generally well tolerated, but the anchored bar and the unsupported hinge bring a few specific considerations:
- Secure the bar and plates. Use a stable landmine or a protected corner, and always collar the plates.
- Keep your hand clear of the plates. Grip the sleeve beyond the collar, so your fingers can’t be pinched between the plates and the collar.
- Protect your lower back. Keep a neutral spine, support yourself with your free forearm, and start light if you have a history of back pain.
- Respect your shoulder. If the flared elbow path causes discomfort, bring the elbow slightly closer to the body or switch to the standard landmine row.
Meadows Row Variations
These variations let you change the support, the emphasis, or the equipment:
Bench-Supported Meadows Row
Difficulty: Intermediate
Rest your free hand on a sturdy bench instead of your thigh. The extra support reduces the demand on the lower back and makes it easier to keep the torso square.
Dumbbell Meadows Row
Difficulty: Intermediate
Use the same staggered stance, holding a dumbbell overhand with the elbow traveling away from the body. It’s a practical option when no landmine is available, although the dumbbell moves freely rather than along an arc.
Paused Meadows Row
Difficulty: Intermediate
Hold the top position for one to two seconds on every rep. The pause removes momentum and increases the demand on the upper back.
Deficit Meadows Row
Difficulty: Advanced
Stand on a low, stable platform to increase the range of motion at the bottom. It requires good hamstring flexibility and a very solid hinge.
Replacement Exercises
If you don’t have a landmine setup or want a similar training effect with a different feel, these exercises are good substitutes:
- Single-Arm Landmine Row. The closest alternative, with a neutral grip and an elbow path closer to the body, which shifts the emphasis toward the lats.

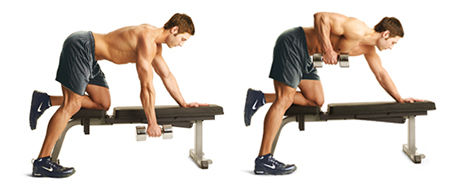
- One-Arm Dumbbell Row. The one-arm dumbbell row uses the same unilateral pattern with bench support.
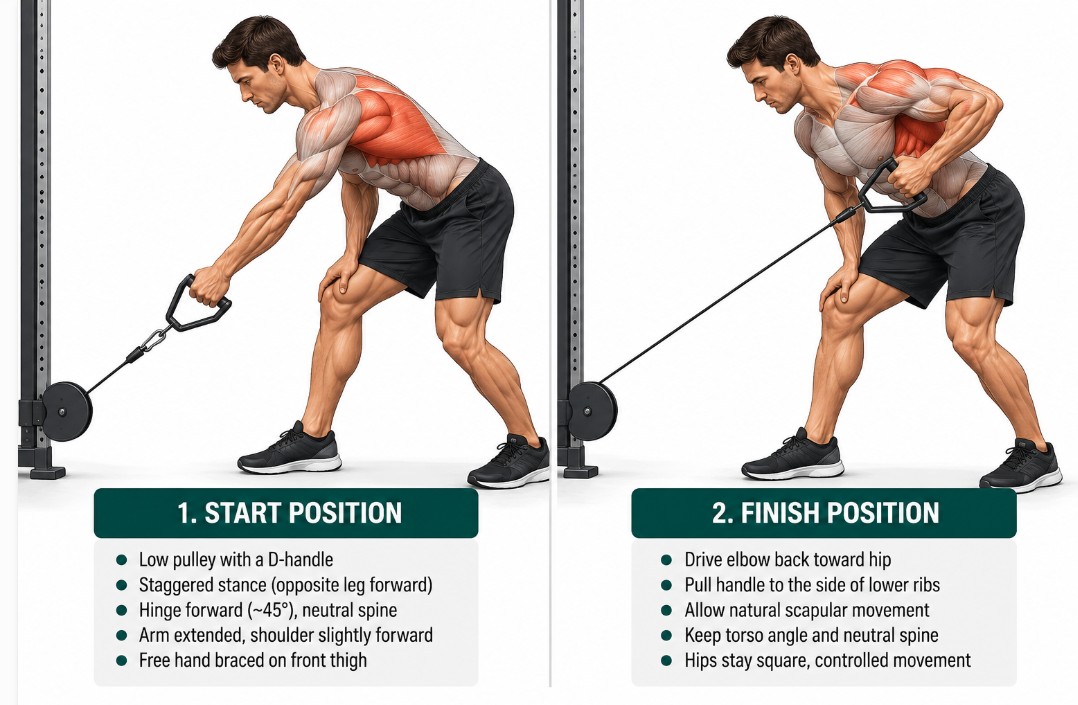
- One-Arm Cable Row. The one-arm cable row keeps cable tension throughout the movement.
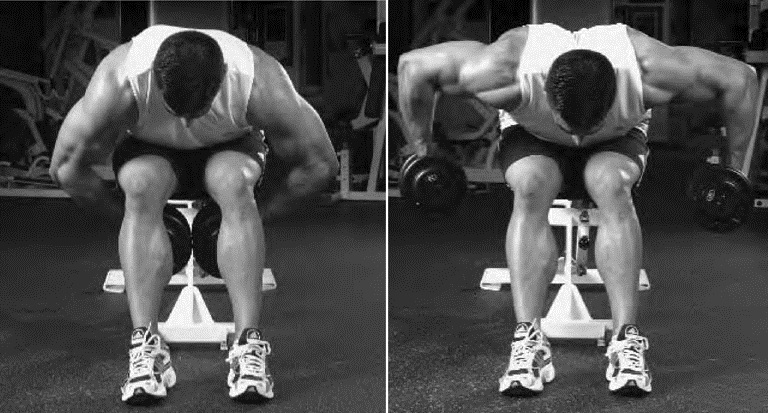
- Dumbbell Rear Delt Row. The dumbbell rear delt row uses a similar flared elbow path with a stronger focus on the rear delts.
- Supported T-Bar Row. The supported T-bar row keeps an anchored-bar feel with chest support, allowing heavier two-arm work.

- Barbell Seal Row. The barbell seal row trains the upper back with almost no lower back demand.

How to Program the Meadows Row
Use the box below as a starting point and adjust it to your goals and training split.
Show full programming guideHide programming guide ▾
| Goal | Sets | Reps | Rest | Tempo |
|---|---|---|---|---|
| Hypertrophy | 3–4 | 8–15 | 60–90 s per side | 2–3 s lowering, brief pause at the top |
| Strength | 3–4 | 6–8 | 90–120 s per side | Controlled lowering, firm pull |
| Muscular endurance | 2–3 | 15–20 | 45–60 s per side | Steady, controlled |
On this exercise, grip and posture often limit heavy sets before the back muscles are fully challenged, so moderate loads with a full range of motion are a practical default. Muscle growth has been reported across a broad spectrum of loads and repetition ranges, provided sets are taken reasonably close to failure.
- As a main or secondary row on back or pull days
- After heavy two-arm rows, such as the Pendlay row, to train each side on its own
- In upper-back-focused sessions alongside rear-delt work
- Paired with a vertical pull, such as pull-ups or lat pulldowns
Add reps first, then a small plate once you reach the top of your rep range on both sides with a full stretch and a square torso. Starting each set with your weaker side helps keep both sides even. Apply progressive overload without sacrificing the range of motion.
Meadows Row vs Single-Arm Landmine Row
Both exercises use the same anchored barbell, but the setup changes the emphasis:

| Feature | Meadows Row | Single-Arm Landmine Row |
|---|---|---|
| Stance | Perpendicular to the bar, staggered | Beside the bar, parallel or staggered |
| Grip | Overhand on the thick sleeve | Neutral on the bar near the loaded end, or a handle |
| Elbow path | Up and away from the torso | Close to the torso, toward the hip |
| Typical emphasis | Upper back and rear delts, plus lats | Lats |
| Grip demand | High | Moderate |
| Torso angle | Close to parallel, hips high | Between about 45° and nearly parallel |
| Experience level | Intermediate to advanced | Beginner to advanced |
| Best for | Unilateral upper-back emphasis | Unilateral lat emphasis and learning landmine rows |
The main difference is the elbow path. In the Meadows row, the perpendicular stance and overhand sleeve grip let the elbow travel away from the body, shifting more work to the upper back and rear delts. In the single-arm landmine row, the neutral grip keeps the elbow close to the torso, which emphasizes the lats.
Neither is better overall. Many lifters use both: the landmine row for lat-focused work and the Meadows row for the upper back. For more ideas, see our list of the best exercises for developing back thickness.
Final Thoughts
The Meadows row is a practical one-arm landmine row that trains the upper back, rear delts, and lats while challenging your grip and your ability to resist rotation. The key is the setup: a perpendicular, staggered stance, an overhand grip on the sleeve, and an elbow that travels up and away from the body.
Use a load that allows a full stretch on every rep, consider straps when your grip limits the set, and keep your torso square. To understand the muscles behind every rowing movement, read our guide to the muscles involved in pulling movements.
Frequently Asked Questions
What muscles does the Meadows row work?
It mainly works the lats, middle traps, rhomboids, and rear delts, with help from the teres major and elbow flexors.
Who invented the Meadows row?
It’s named after the late IFBB pro bodybuilder and coach John Meadows, who popularized it.
What’s the difference between the Meadows row and the landmine row?
The Meadows row uses a perpendicular stance and an overhand sleeve grip, with the elbow traveling away from the body; the landmine row keeps the elbow closer to the torso.
Should I use straps for Meadows rows?
Straps are a good idea when your grip fails before your back, which is common because of the thick sleeve.
Do I need a landmine attachment?
No. A secure corner protected with a towel works, as long as the bar can’t slide.
Is the Meadows row good for back thickness?
It trains the upper back and lats effectively, but the idea that some exercises build only “thickness” or “width” is a simplification.
How heavy should I go on Meadows rows?
Use a load that allows a full stretch at the bottom and a square torso on every rep.
Is the Meadows row bad for the lower back?
It’s moderately demanding. Use your free forearm for support and keep a neutral spine, or choose a chest-supported row if needed.
Can I do Meadows rows with a dumbbell?
Yes. The dumbbell Meadows row uses the same stance and elbow path, although the dumbbell moves freely rather than along an arc.
